Me and Ken experimenting video recording and live streaming options for our podium RK.
Post-edited videos
Previously, we tried video recording. Having a camera pointing at the speaker and the projected slides is definitely a bare minimum. But for better quality we went for a slightly more engineered setup -- we had speakers record their screens for the slides, and we used a cellphone to record a video for the speaker, then we manually combined them together.
It works. Most of our older videos, such as this one, were recorded this way. But post-editing takes a lot of time, unless you have a designated computer to handle this, the time you wait for the video editing software to render the combined video you nearly cannot do anything with the machine.
So both pros and cons are clear. It's easy to setup, but it takes a lot of time to edit. And clearly we couldn't live stream with this.
Pre-processed video recording
We learned the basics of video recording from EngineersSG, a volunteer-based organization in Singapore that records meetup and conference videos. The key is that instead of post-editing the video, we prepare a setup to combine all the sources together, same time as the talk goes. By the time the talk is done, the video is done.
To make it work, we need to record and combine the following sources:
- speaker's video, via an external webcam
- speaker's audio, via an external mic
- slides (explained below)
OBS Studio for combining all the input
The magic to combine all those sources is OBS Studio, an open source software for video editing.
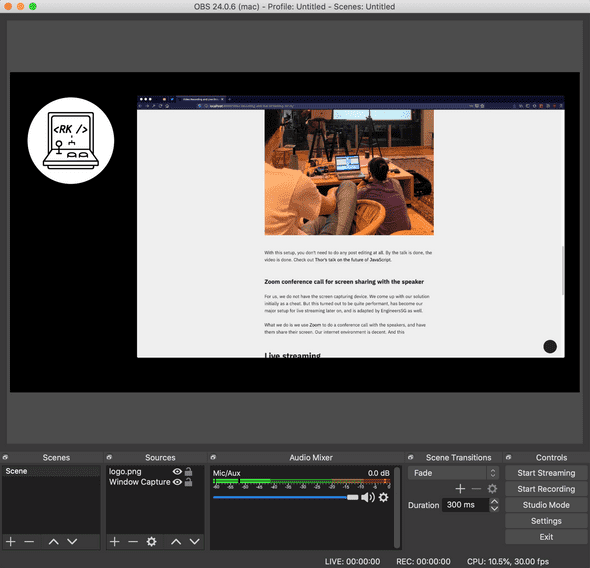
On the lower left corner you have "Scenes". They are used to save a set of combinations of sources you can quickly switch to as the event goes.
In the panel next to it, called "Sources", you can pick which input sources will show up in each scene.
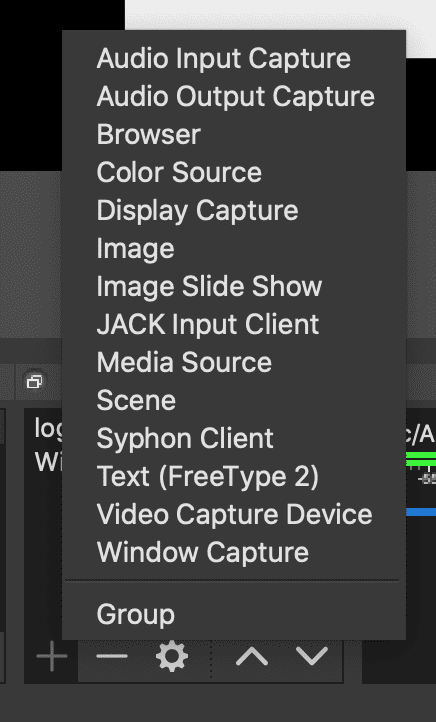
There are many types of sources. The ones we use often are:
- Image for the logo or banner
- Video Capture Device for the webcams
- Window Capture for any window on your laptop (we'll talk about this in more detail in the next section)
Sourcing speaker's screen as input to recording machine
Sourcing in the slides is the most tricky part in this setup. Why? Let's say you have speaker's laptop presenting something, and you want that to show up on your screen. The problem is your laptop cannot by itself treat the speaker's laptop as a screen input (you can try connecting two laptops with a HDMI cable and see what happens). So what we need to do is to turn speaker's laptop output into an input source to our laptop.
What EngineersSG does to solve this problem, which is much more professional than ours, is to use a screen capturing device, Avermedia Live Gamer Portable, to turn speaker screen into input to recording laptop. They have a training video to explain this whole setup, and you can watch it here.
Here is a recent photo of an EngineersSG volunteer recording a meetup talk, tweet by Thor.
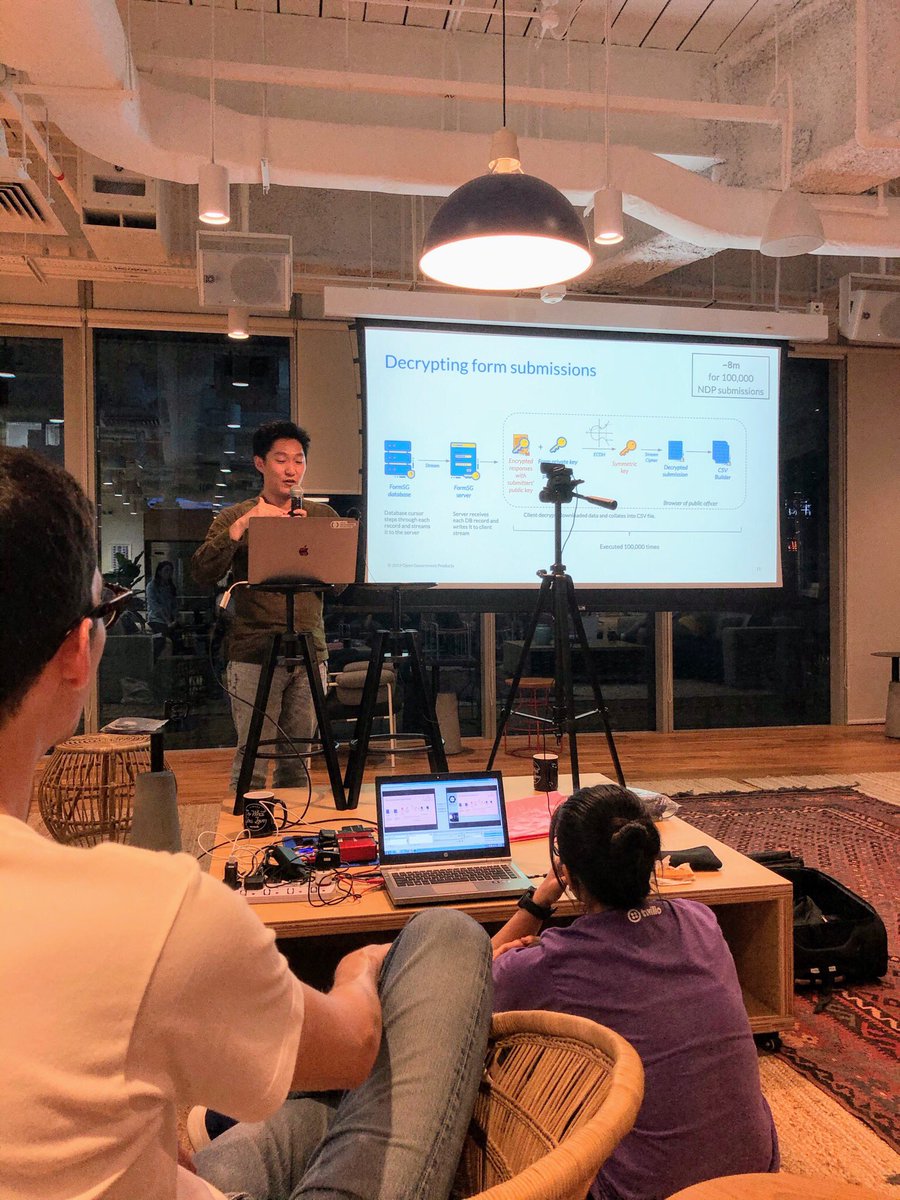
With this setup, you don't need to do any post editing at all. By the time the talk is done, the video is done. Check out Thor's talk on the future of JavaScript:
Zoom conference call for screen sharing with the speaker
For us, we do not have the screen capturing device. We came up with our solution initially as a cheat. But this turned out to be unexpectedly performant. It has then become our major setup for live streaming, and it is adapted by EngineersSG as well.
What we do is we use Zoom to do a conference call with the speakers, and have them share their screens. With decent Internet this setup is delivering satisfying result. There is no delay between the con-call screen sharing and the real-time audio, which we capture from the room. And it's not using as much resources as Google Hangouts. Note that your speakers do need to install Zoom on their laptops to ensure better performance.
To view a video recorded with the setup above, check out RK #63 - "CSS".
Live streaming
Not long after we started recording our videos regularly, Singapore got hit by covid-19. A lot of our meetups are going online, if not cancelled. We do prefer running all RK physically, the physical connection is nowhere comparable by watching videos. But under the subpar scenario we also do not want to pause RK. So we've been trying to make it work for live streaming.
Live streaming with YouTube
OBS is built for broadcasting, so the configuration is really simple. You can follow this guide to setup OBS with your YouTube channel for live streaming.
Sources
The sources are similar with video recording, with some more fine-tuned selection and combination in scenes.
Video
- Laptop webcam for hosts, because we are sitting close to the recording screen (and no, we don't have a separate person solely responsible for recording, which is probably why we still seem a bit... busy 😅)
- External webcam for the speaker if the speaker is in the room
Audio
- Snowball iCE for any audio input in the room. It is critical that we use a separate source for audio in our setup. Because the laptop fan is screaming once the OBS Studio is working hard. And the audio effect is very bad.
- iShowU to take remote speakers' audio
Windows
- Browser to present anything directly as host
- Zoom to present speakers' slides or remote speakers' slides + graphics
When you select "Window Capture", you can double click the item to see some further configurations:
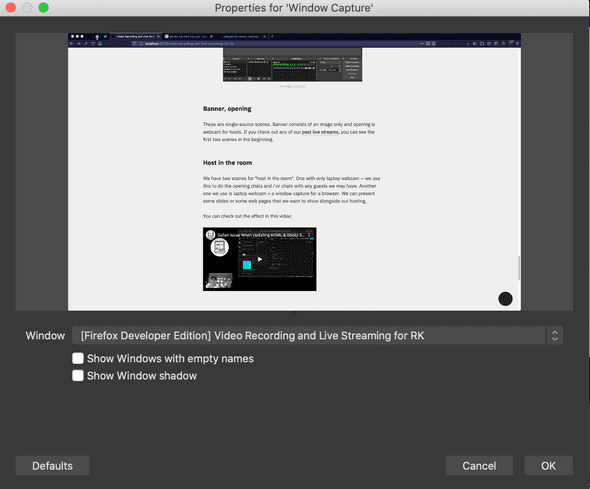
With different "window capture", we can adapt to a few different scenarios including host in the room, speaker in the room, remote speakers, etc.
Switching scenes
One big challenge for live streaming is that it's very time-sensitive. To transit as smoothly as physically passing from hosts to speakers, we really need to fully utilize the "scenes" feature from OBS.
Here are our scenes:
- banner
- opening
- hosts in the room
- speakers in the room
- remote speakers
Banner
- Image - banner
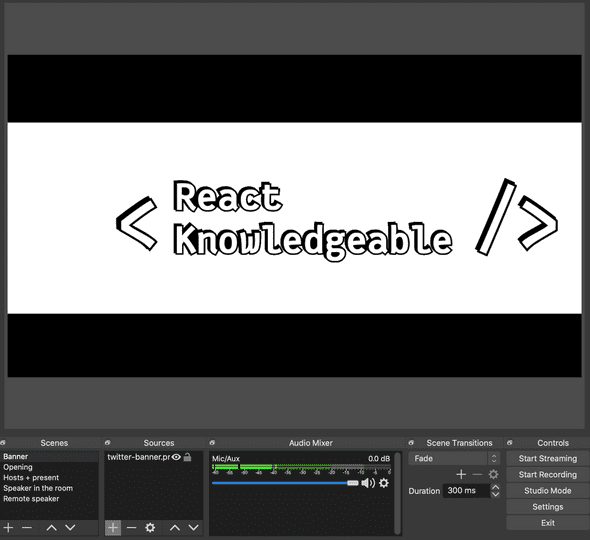
This is a very simple scene consisting of a single image only. We always open with this to tell everyone that we are about to start. We do not include an audio source such that whatever we speak during this scene won't be broadcasted out.
Opening
- Image - logo
- Audio - Snowball iCE
- Video - laptop webcam
This scene has a logo, laptop webcam for hosts' faces, and audio. Be mindful that you do need to include the an audio source for it to be captured.
If you check out any of our past live streams, you can see the first two scenes in the beginning.
Hosts in the room
sources
- logo - image
- audio - Snowball iCE
- video - laptop webcam
- slides / web browsing - window pointing to a browser
We use this to do the opening chats and / or chats with any guests we may have. The addition is a window capture, normally pointing to a browser, to present whatever we have to share.
You can check out the effect in this video:
Speaker in the room
sources
- logo - image
- audio - Snowball iCE
- video - external webcam pointing at the speaker
- slides - window pointing to Zoom
For speaker in the room, we are using the same layout with "hosts in the room", but with two different sources. The video comes from external webcam pointing at the speaker, and the window goes to Zoom's screen sharing.
Remote speaker
For remote speaker, we're using a slightly different layout. We don't need any of the webcams since we're taking video directly from Zoom's conference call for speakers' video and slides.
Meanwhile, the tricky part is to take in remote audio, which we'll explain soon.
sources
- logo - image
- audio - iShowU to take audio from Zoom (explained below)
- speaker video + slides - window pointing to Zoom
Since OBS does not have an option to take audio input from window, it takes some extra work to source in audio from the Zoom conference call. A naïve approach would be to play it out and then capture it with a mic -- it should work but we don't expect the performance to be good. We tried with EngineersSG's setup to source out one laptop (audio + video) to another laptop for capture. Sometimes the performance is ok, some other time the audio is dropping badly.
What we eventually found out that works is to use a third party software, iShowU, which can turn any app's audio output into an audio input to your laptop. And you can then choose "iShowU" from OBS's audio input source.


Together with Zoom screen sharing to take in speakers' videos and slides, RK now can fully accommodate remote speakers.
Remote speakers + hosts
- logo - image
- audio for remote speaker - iShowU
- audio for hosts - Snowball iCE
- video and slides for speakers - window from Zoom
- video for hosts - laptop webcam
As you can see, this is where it grows and you can customize to your own needs. The guiding principle is to make sure you source in each necessary components and check their qualities when you set them up.
Our latest live stream (as of Mar 17) had both speakers call in from remote, and you can check out the video here:
Fact sheets
Hardware
- Laptop: MacBook Pro 15', Mid 2015
- Operating System: Catelina
-
Webcams:
- Laptop webcam
- B525 Foldable Business Webcam1
- Mic: Snowball iCE
- Tripod
1. This webcam does not have a tripod mount but is the only one we have. You should get one that can be mounted to a tripod.
Software
Caveats
- Do not crop the windows that are used as an input to OBS
Wrapping up
Here is a photo for the full setup:
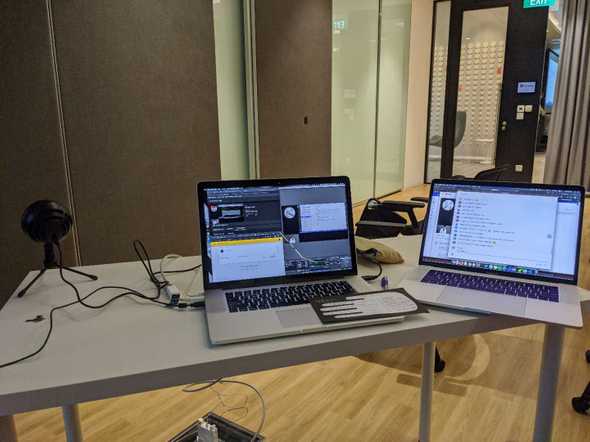
When we host the event, I'd be busy handling all the scene switching where Ken would be attending to the live chats. We're not very great at conversations and we're kinda busy too -- now you know 😅
I really hope this writeup can help more meetup organizers overcome this virus period. And hope verything will get back to normal soon, too.
Finally, we do need more subscribers for our YouTube channel (https://www.youtube.com/channel/UCswxnKjnWhnSR00wC1J8LZA) to get rid of this trashy URL. As I write this post, we need 24 more. So, if you are a front end developer, please subscribe to our channel, you'll also see what our developers have to share in the future :)